 |
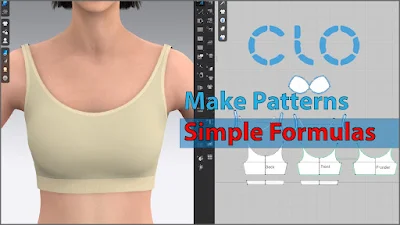
| Draft a bra pattern in clo 3d with a formula image |
|
Hey Members, in this video, I will show you some tips and tricks on how to draft realistic bra patterns, sew and construct the bras, and fit them onto an avatar simply and efficiently in Clo 3D. In the end, you will have a finished garment because I will provide you with the bra measurements' data which you can follow along. See this super comfortable
bra link here via
Amazon.com.
Before we begin, I will show you these measurement guidelines.
How to Draft Sports Bra Pattens in CLO 3D
Avatar: Default size tall
The measurements are in centimeters and most of them are in 1/4.
Bra Measurements
- Bra-Length: 30
- Bust-Circumference: 17.5
- Lower-Bust-Circumference: 15
- Shoulder-Length: 13.5
- Neck-Depth: Back: 12, Front: 13.5
- Neck-Width: 10
Trims Measurements:
- Neck and armhole bands: 0.7
- Hem band: 2.8
Formulas:
- Shoulder Slope-Back Internal Line Depth: 1.5
- Shoulder Slope-Front Internal Line Depth: 1, 1.25 (from the Shoulder Slope-Back)
- Armhole Depth: Full shoulder length divided by 2 + 4. Ex. 37/2 = 13.5 + 4 = 17.5
- Dart Line: 8.5
Back Bodice:
- 3 internal lines from top down: 1.5, 12, 17.5
- 4 internal lines from the center out: 8.5, 10, 13.5, 15
Front Bodice:
- 1 internal line from top down: 13.5
- 2 internal lines from back shoulder slope: 1, 1.25
- Correcting the internal line length for the front shoulder slope
Create Trims for Hem/Neck/Armhole Bands
- Neck and armhole bands: 0.7
- Hem band: 2.8
- Bodice front: After creating the hems, create 1 internal line from the bottom of 0.8 cm
Creating Bra Pads:
- Use 3D Pen Avatar Tool
- Use Flatten Tool
- Modified the pad
- Clone as internal shape
- Place it onto the pattern (Bodice-F-under)
- Please see the video link for a hands-on tutorial
Creating 2 Notches on Each Side for the Bodice-F and Lining
- 5 cm from the hem up
- 4 cm from the hem up
Creating a Lining for the Bodice-F
- 1 lining for the bodice front
Sew and Construct Sports Bra in CLO 3D
- Import the dxf patterns into CLO 3D
- Remove the patterns you don't need
- Place the patterns onto the avatar
- Sew the patterns
- Fit and render the sports bra
- Apply the fabric (Knit_Cotton_Jersey)
- Change the fabric's color to cream
- Apply elastic property to all trims
- Change the elastic's color to complement the design
- Apply topstitches
- Remove the undergarments on the avatar
Elastics Property Data:
- Knit Elastic: Rotate fabric grain direction to 90 degrees
- Neck/armhole bands: Strength: 40, Stiffness: 30
- Hems: Strength: 90, Stiffness: 70
Top Stitches:
1) Zigzag Front hem-sides
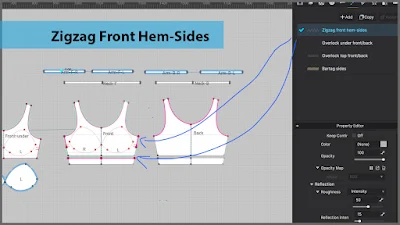 |
| Zigzag top stitches in clo 3d image |
- Shape: zigzag
- Offset: 1/16
- Width:0.3
- Color: slightly darker than the garment
- Face: front
- Number of lines: 1
2) Overlock Under front-back
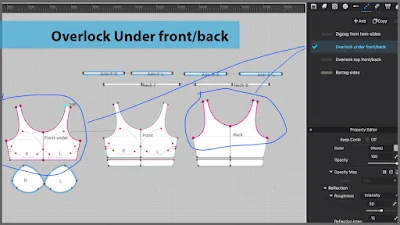 |
| Overlock stopstiches clo 3d image |
- Shape: overlock
- Offset: 1/16
- Width:0.2
- Color: slightly darker than the garment
- Face: back
- Number of lines: 1
3) Overlock Top front-back
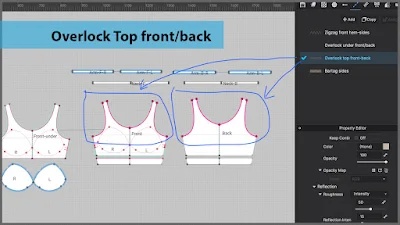 |
| Overlock topstitches front/back clo 3d image |
- Shape: overlock
- Offset: 1/32
- Width:0.2
- Color: slightly darker than the garment
- Face: front
- Number of lines: 1
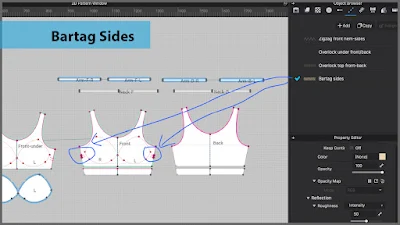
4) Bartag Sides
 |
| Bartag topstiches clo 3d image |
- Shape: Bartag
- Offset: 1/16
- Width:0.3
- Color: slightly darker than the garment
- Face: front
- Number of lines: 1
Rendering:
- Particle Distance: 10 for bodices, 5 for trims
- Thick texture surface
- High-quality rendering
- Skin style: Nude
- Skin offsets: 1
- If necessary arrange front patterns layers from 0 (front-under),1 (pads),2 (front-top)
There you have it, guys. I hope you find this video helpful, and remember to give it a thumbs up and follow me on Encoder Fashion for tips and tricks about making patterns in Clo 3D.


Comments
Post a Comment
Please share your thoughts! No spam or links — let’s keep it helpful for everyone. 💛